When it comes to ensuring the cleanliness of your heating and cooling system, there are several key components to inspect.
Let’s delve deeper into the general checks you should be making for the ducts that cool your Houston home.
1. Whole System Examination:
Ducts:
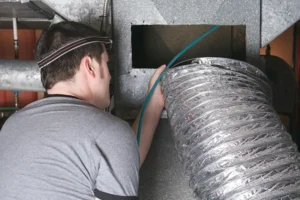
The ducts are the pathways that allow air to travel throughout your home.
Over time, they can accumulate dust, pollen, and other contaminants.
After a cleaning, the inner surfaces of these ducts should appear free from any visible dirt or debris.
Drain Pans:
Located beneath the coils in your HVAC system, drain pans collect condensation to prevent moisture buildup.
A clean drain pan is crucial to prevent mold growth and water damage.
Ensure that the pan is not only clean but also free from any standing water, indicating proper drainage.
Humidifiers:
These devices add moisture to the air to maintain a comfortable humidity level in your home.
A clean humidifier ensures that you’re not adding contaminated moisture into the air you breathe.
Check for any mineral deposits or mold growth, both of which can be signs of neglect.
Coils:
Coils play a vital role in cooling your home.
Over time, they can become coated with dust and grime, reducing their efficiency.
Both the evaporator and condenser coils should appear clean and free from any buildup.
Fans:
The fans in your HVAC system circulate air throughout your home.
Dust and debris can accumulate on fan blades, leading to reduced airflow and efficiency.
Each blade should be clean, and the fan motor should operate without any strange noises.
Ducts and Plenums Inspection:
Understanding Plenums:
Plenums are essentially spaces within the HVAC system where air is collected or distributed.
They can be found in areas like above ceilings or below floors and serve as a bridge between the main HVAC unit and the ductwork.
Checking the Plenums:
Given their role, it’s crucial that plenums remain clean.
Contaminated plenums can distribute dirty air throughout your home.
When inspecting, ensure that the surfaces inside the plenums are visibly clean.
If the service provider uses remote photography or cameras, ask them to show you images of the inside of the plenums to verify their cleanliness.
In-Depth Examination of Heating and Cooling Components
Ensuring that your heating and cooling system is functioning at its best requires a meticulous examination of its various components.
Let’s dive deeper into the specific checks for the heating, cooling, and blower sections:
Heating Checks:
Heat Exchanger:
The heat exchanger is a critical component that transfers heat from the combustion gases to the air in your home.
Over time, it can accumulate soot, dust, and other contaminants.
What to Check:
The surface of the heat exchanger should be free from any visible dirt, soot, or rust.
A dirty heat exchanger can reduce efficiency and may even pose safety risks.
Ensure that there are no cracks or signs of wear, as these can release harmful gases into your home.
Cooling Checks:
Cooling Coil (Evaporator Coil):
This coil holds the refrigerant that absorbs heat from the indoor air. It’s vital for the cooling process.
What to Check:
Both the front and back sides of the cooling coil should appear clean.
A simple test is to shine a flashlight on one side of the coil.
If the coil is clean, light should easily pass through and be visible on the other side.
A blocked or dirty coil can reduce the system’s cooling efficiency.
Coil Fins:
These thin metal pieces surround the coil and help in heat transfer.
What to Check:
The fins should be straight, evenly spaced, and free from damage.
Bent or squished fins can restrict airflow and reduce the system’s efficiency.
There are tools available, like fin combs, that can help straighten any bent fins.
Drain Pan:
Located beneath the cooling coil, this pan collects condensation and prevents water overflow.
What to Check:
The drain pan should be free from any mold, algae, or mineral deposits.
Ensure that there’s no standing water, which can indicate a clogged drain line.
Water should flow out smoothly, preventing any potential water damage or mold growth.
Blower Checks:
Blower Blades:
These blades push air throughout your HVAC system and into your home.
What to Check:
Each blade should be free from dust, grime, and oil.
Dirty blades can reduce airflow and make the blower work harder, leading to increased energy consumption.
The blades should also be free from any signs of damage or wear.
Blower Compartment:
This is the housing that contains the blower blades and motor.
What to Check:
The entire compartment should be free from dust, dirt, or any debris.
A clean compartment ensures optimal airflow and reduces the risk of any contaminants being circulated into your home.
Detailed Inspection of Plenums, Ducts, and Access Doors
To ensure the optimal performance and cleanliness of your HVAC system, it’s crucial to inspect various components, including the plenums, ducts, and access doors.
Let’s delve deeper into what you should be looking for in each of these sections:
Plenum Checks:
Return Air Plenum:
The return air plenum is responsible for channeling the air from your home back into the HVAC system for heating or cooling.
What to Check:
The interior of the return air plenum should be free from any visible dust, dirt, or debris.
Any accumulation can hinder airflow and reduce the system’s efficiency.
Filters:
Filters play a pivotal role in trapping contaminants and ensuring clean air circulation.
What to Check:
The filters should fit snugly within their designated slots, ensuring no gaps that might allow unfiltered air to pass through.
Additionally, always use the type and grade of filter recommended by the HVAC system’s manufacturer.
This ensures optimal filtration and system performance.
Supply Air Plenum:
This component directs the conditioned air from the HVAC system back into your home.
What to Check:
Inspect the supply air plenum for any signs of dirt, mold, or moisture stains.
A clean plenum ensures that only clean, conditioned air is distributed throughout your home.
Duct Checks:
Metal Ducts:
These are the primary pathways for air circulation in many HVAC systems.
What to Check:
The interior surfaces of the metal ducts should appear clean and free from any dust or debris.
It’s a good practice to inspect multiple spots, both in the return and supply sections, to ensure thorough cleanliness.
Fiber Glass:
Some duct systems use fiber glass for insulation and sound dampening.
What to Check:
The fiber glass material should be intact, without any tears, abrasions, or signs of wear.
Damaged fiber glass can release particles into the air and reduce the system’s efficiency.
Access Door Checks:
New Doors:
Access doors provide entry points for maintenance and inspection of the duct system.
What to Check:
Any newly installed access doors should be securely attached.
Relying solely on duct tape is not sufficient.
Proper installation methods include using screws, rivets, or mastic sealants to ensure a tight seal.
Air Leaks:
Air leaks can reduce system efficiency and increase energy costs.
What to Check:
With the HVAC system running, place your hand near the access doors.
You should not feel significant air drafts or leaks.
Minimal to no air leakage indicates a well-sealed system.
Detailed Examination of Air Vents and System Operation
Ensuring the cleanliness and functionality of your HVAC system goes beyond just the ducts and primary components.
The air vents and overall system operation play a crucial role in maintaining the air quality and comfort of your home.
Let’s delve deeper into these aspects:
Air Vent Checks:
Registers, Grilles, and Diffusers:
These components are the final exit points for conditioned air into the rooms of your home.
They play a pivotal role in ensuring even air distribution.
What to Check:
Each register, grille, and diffuser should be firmly attached to the walls, floors, or ceilings, without any loose or wobbly parts.
Additionally, their surfaces should appear clean and free from dust, grime, or any signs of mold.
A dirty vent can reintroduce contaminants into the air you breathe.
System Operation Checks:
Heating and Cooling:
After a thorough cleaning, it’s essential to ensure that the system’s primary functions are still intact.
What to Check:
Turn on the HVAC system and test both the heating and cooling modes.
The system should respond promptly, and you should feel the appropriate warm or cool air coming from the vents.
Listen for any unusual sounds, as these could indicate issues.
The airflow should be consistent, without any noticeable interruptions or fluctuations.
Always Ask Questions:
If, after your inspection, something doesn’t seem right or you answer “No” to any item on the checklist, it’s crucial to address it immediately.
Action Steps:
Bring up any concerns with the service provider and request corrections.
A reputable air duct cleaning company will be willing to address any oversights or issues.
Ensure that all aspects of the cleaning meet your satisfaction before the service provider departs.
Remember, you’re the customer, and it’s your right to demand quality service.
Conclusion:
The importance of clean ducts and a well-functioning HVAC system cannot be overstated.
They directly impact the air quality in your home, affecting your health and overall comfort.
By meticulously following this detailed guide and not hesitating to ask questions, you can have peace of mind knowing that your HVAC system has been cleaned and serviced to the highest standards.
Always prioritize your well-being and ensure you’re getting the value and quality you paid for.


